


by Mauricio Rojas, on Sep 27, 2022 4:42:12 PM
What is AirFlow?
Apache Airflow is an open-source workflow management platform for data engineering pipelines.
Airflow is written in Python, and workflows are created via Python scripts. Airflow is designed under the principle of "configuration as code".
Airflow Basic Concepts
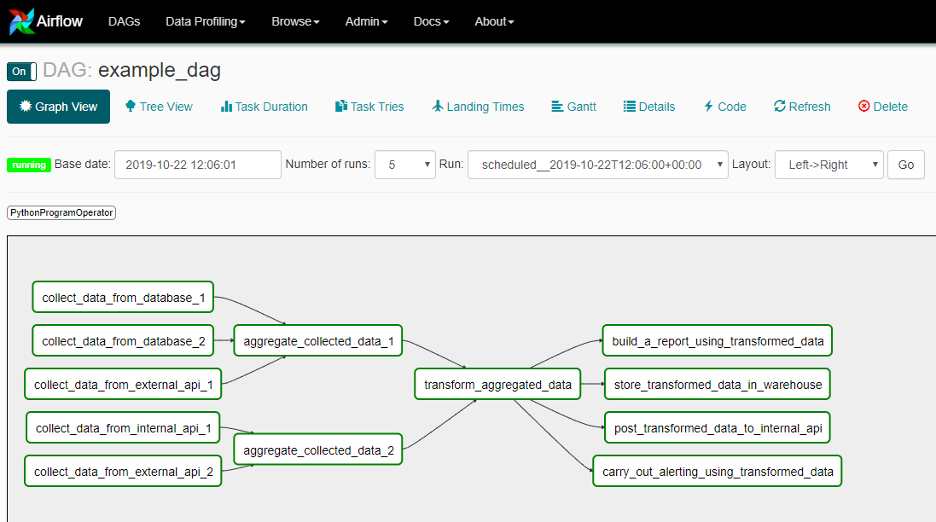
In Airflow a workflow is called a DAG (Directed Acyclic Graph). It is just a tree of dependencies.
In general, your workflow or DAG is made up of Tasks and those tasks can be implemented using operators. Airflow provides several built in operators; for example:
- BashOperator executes a bash command
- PythonOperator call a python function
- EmailOperator sends an email
- SimpleHttpOperator sends an http request
- Sensor waits for certain time, file, a row,…
You can also create custom operators in case you want to wrap up some custom functionality or connection to a new system.
Native Snowflake Integration in Airflow
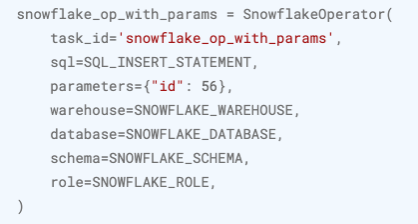
Airflow provides several additional operators, for example the SnowflakeOperator. You can use this operator to create a connection and execute SQL statements, as in the following example:
Ok, so up until now, we have given a brief intro about Airflow and we have outlined that there is native support in Airflow to connect to Snowflake.
A common use of Airflow is to orchestrate complex data-engineering pipelines running in Spark or DataBricks.
In this post we will explore a side by side example of an DAG where we will launch a Spark job and then we will show the equivalent using Snowpark.
So lets introduce our example:
Setting up Airflow
If you haven’t installed Airflow, I recommend to just follow the official installation instructions.
Airflow has many setup methods. In this case we will install using PIP.
Please read Airflow install documentation for more details.
When you install airflow the recommended approach is that is uses a constraint file. There are several constraint files, depending on Airflow and Python versions.
In this example we will use Airflow version 2.4.0 and Python 3.8.
NOTE: Python version is important as Snowpark for Python uses 3.8.
Ok. Now for installation, go to the command prompt or terminal if you are using BDS, and then run:
pip install snowflake-connector-python[pandas]
pip install snowflake-snowpark-python
pip install "apache-airflow[async,spark,snowflake]==2.4.0" --constraint https://raw.githubusercontent.com/apache/airflow/constraints-2.4.0/constraints-3.8.txt
export AIRFLOW_HOME=$(pwd)/airflow
airflow db init
airflow standalone
This is just for convenience, but I recommend it as it is very helpful.
# install ngrok thru pypi
pip install pyngrok
# you will need to setup your authentication token. Just browse to NGROK website https://ngrok.com/
ngrok config add-authtoken your_token
Ngrok will display an screen like:
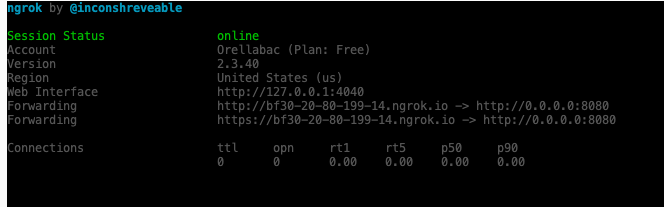
Use the https url to open the Airflow Console.
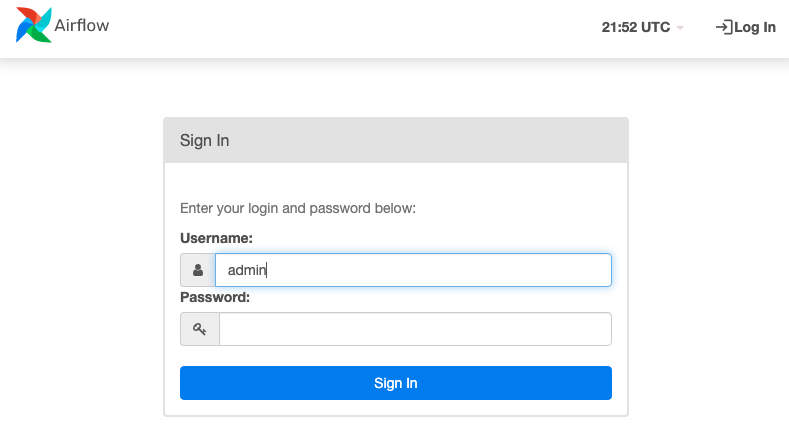
And log in with the admin and the password as explained before.
Airflow Example with Spark
Ok, first we will use an example DAG as our starting point. This DAG is mostly just illustrative, and after introducing it we will modify it to run a spark job.
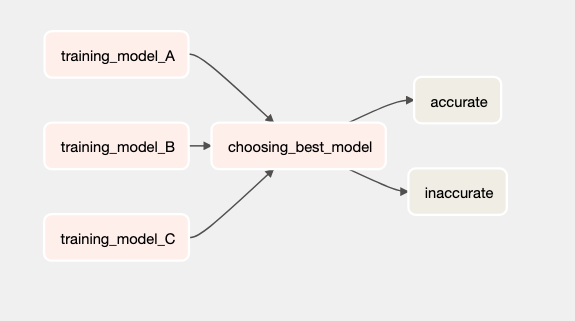
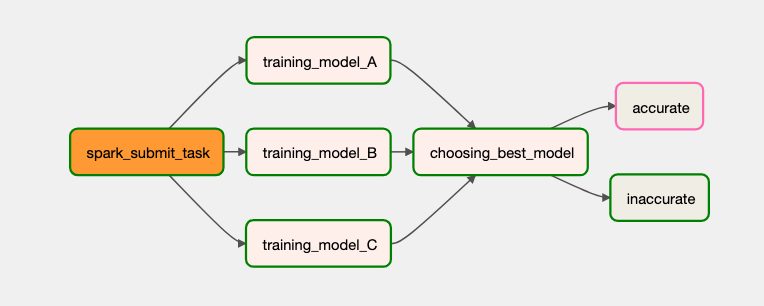
from airflow import DAG
from airflow.operators.python import PythonOperator, BranchPythonOperator
from airflow.operators.bash import BashOperator
from datetime import datetime
from random import randint


def _choosing_best_model(ti):
    accuracies = ti.xcom_pull(task_ids=[
        'training_model_A','training_model_B','training_model_C'])
    if max(accuracies) > 8:
        return 'accurate'
    return 'inaccurate'

def _training_model(model):
    return randint(1, 10)

with DAG("my_dag", start_date=datetime(2021, 1 ,1), schedule_interval='@daily', catchup=False) as dag:

    training_model_tasks = [
        PythonOperator(
           task_id=f"training_model_{model_id}",
           python_callable=_training_model,
            op_kwargs={
            "model": model_id
            }
        ) for model_id in ['A', 'B', 'C']
    ]
    choosing_best_model = BranchPythonOperator(
        task_id="choosing_best_model",
        python_callable=_choosing_best_model)
    accurate = BashOperator(
        task_id="accurate",
        bash_command="echo 'accurate'")
    inaccurate = BashOperator(
        task_id="inaccurate",
        bash_command=" echo 'inaccurate'")
    training_model_tasks >> choosing_best_model >> [accurate, inaccurate]
This DAG will look like this:
And we will add a spark job. Spark Jobs are usually packages as a Python egg.
Remember to install spark. It can be as simple as pip install pyspark[sql]
- Read movie's crew and cast data from the file system
- Create Spark schema and data frame
- Load spark data frame into hive tables
- Read form hive tables and table record counts.
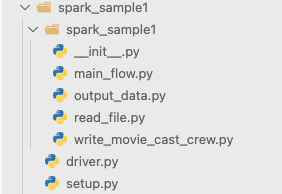
Notice that we have an inner spark_sample1 folder. That is the folder that will be inside the .egg when it is built.
The setup.py files is the file that controls how the .egg is built.
The driver.py file is the file that will control the execution of the spark job.
I won't go into details about this job, maybe for another post.
To build the end execute these steps:
cd ./spark_sample1
# just to make sure all versions are deleted
rm -rf dist
python setup.py bdist_egg
Once you have built the .egg you can submitted to spark like this:
spark-submit --master local --py-files ./dist/spark_sample1-0.0.1-py3.8.egg driver.py
Ok now, let's add it to the current dag.
First add an import of the spark operator
from airflow.providers.apache.spark.operators.spark_submit import SparkSubmitOperator
Next configure an spark connection go to Admin\Connections and create a spark_local connection
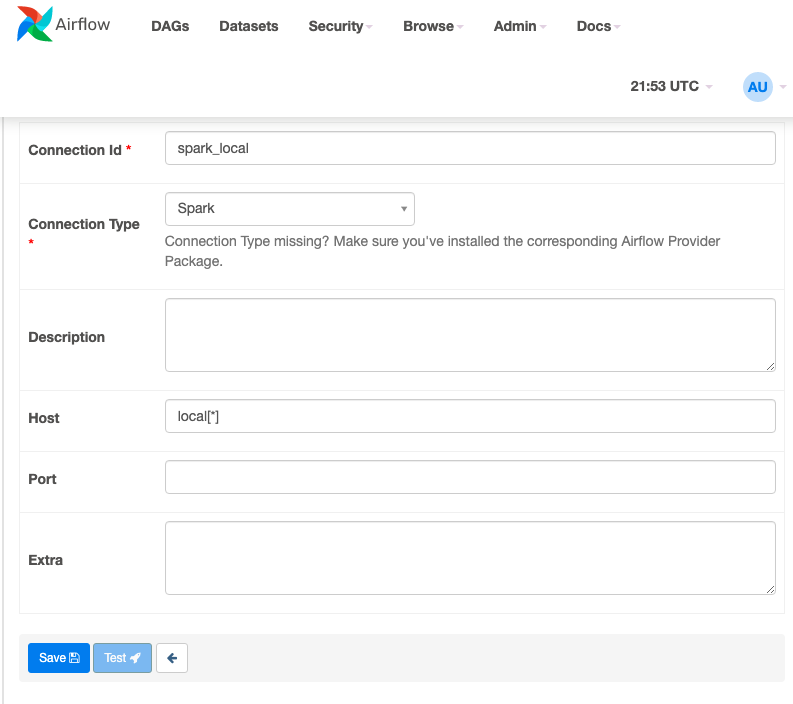
And then we can add utility method like:
# Some code omitted

from airflow.providers.apache.spark.operators.spark_submit import SparkSubmitOperator

# Some code omitted

def submit(app,py_files,task_id):
     return SparkSubmitOperator(
		application =app,
        py_files=py_files,
		conn_id= 'spark_local',
		task_id=task_id)

with DAG("my_dag", start_date=datetime(2021, 1 ,1), schedule_interval='@daily', catchup=False) as dag:

    spark_submit_local = submit(
		app ='/home/BlackDiamond/workspace/spark_sample1/driver.py' ,
        py_files='/home/BlackDiamond/workspace/spark_sample1/dist/spark_sample1-0.0.1-py3.8.egg',
		task_id='spark_submit_task')

    # Some code omitted ...
    # adding the spark job at the start of the job
    spark_submit_local >> training_model_tasks >> choosing_best_model >> [accurate, inaccurate]
Notice that we are using the SparkSubmitOperator here. We just provide the path to the driver.py program and to the .egg file.
With that our DAG now looks like this, and it will trigger the job execution agains our local spark cluster.
Now Snowpark-Airflow time

Ok in this post we will explore a simple approach. The idea is to illustrate that many of the Spark concepts can be easily mapped to the Snowpark world.
A common question I get is, can I use an egg file in Snowpark. And yes technically you can. In most cases you do not need to. But here we will use it just to show that you can.
Ok so we will pack the code in the same way as in spark.

So we just follow the same folder structure. Notice that we have an inner snowpark_sample1 folder. That is the folder that will be inside the .egg when it is built.
The setup.py files is the file that controls how the .egg is built.
The driver.py file is the file that will control the execution of the snowpark job.
Very similar to the spark job, we can build our snowpark job like this:
cd ./snowpark_sample1
# just to make sure all versions are deleted rm -rf dist
python setup.py bdist_egg
Ok perfect.
Now let's create a new dag. We will use the same initial dag as before.
Ok now, let's add it to the current dag.
First add an import of the snowpark hook operator
from airflow.providers.snowflake.hooks.snowflake import SnowflakeHook
Next configure a Snowflake connection go to Admin\Connections and create a snowflake connection
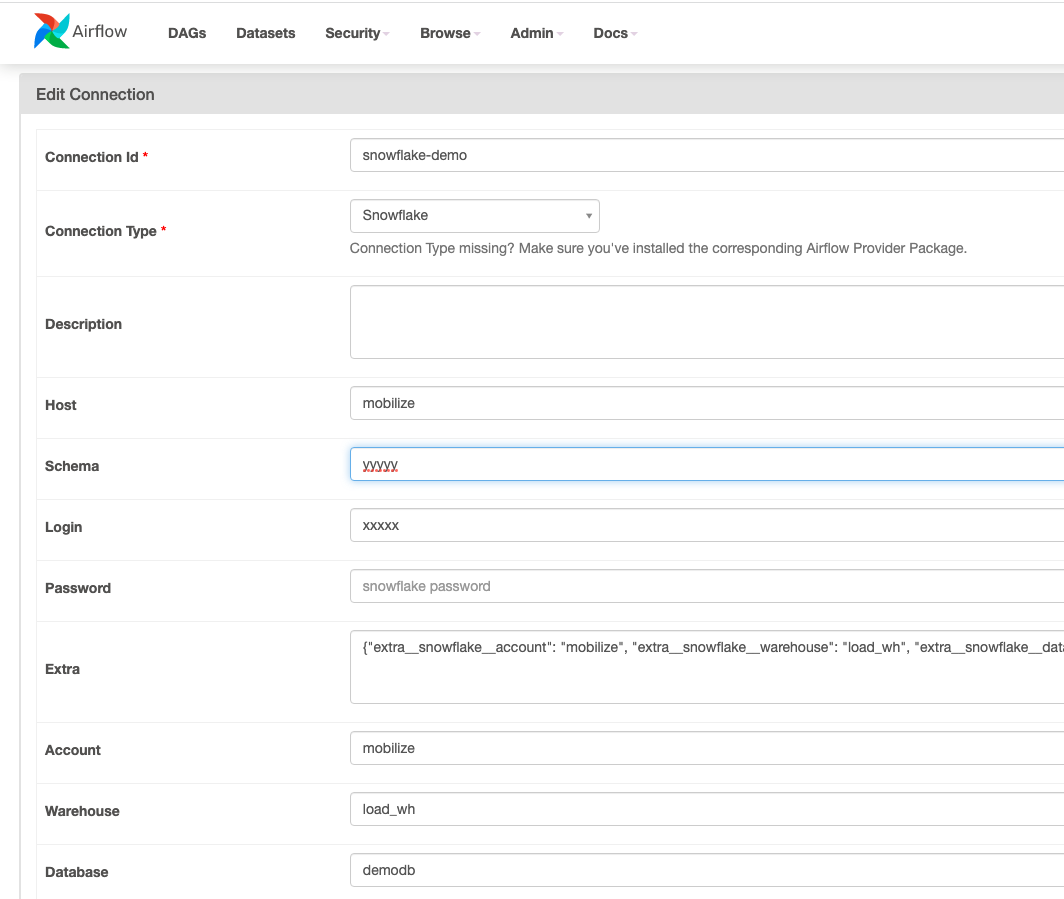
Once we have the connection we can use a code very similar to what we used before. Airflow has a python operator that an be used to trigger snippets of python. We will use that to run the code we wrapped inside the .egg file.
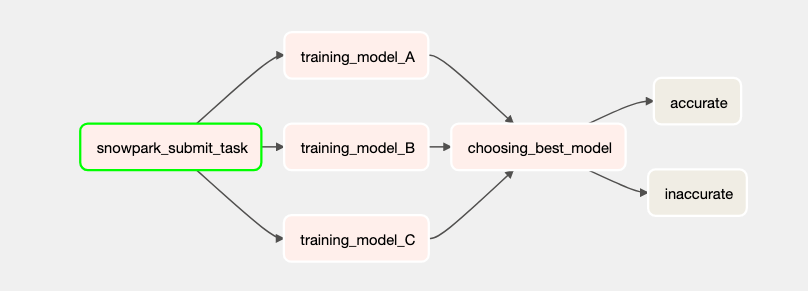
# Some code omitted ...
from airflow.providers.snowflake.hooks.snowflake import SnowflakeHook
# Some code omitted ...
def submit(application,py_files,task_id):
    def execute():
        # the hook is used to create a connection
        hook = SnowflakeHook('snowflake-demo')
        # retrieve it
        conn = hook.get_conn()
        from snowflake.snowpark import Session
        import sys
        # .egg files can be used as module, we just need to add it to the PYTHON PATH
        sys.path.append(py_files)
        # and create a Snowpark session from it
        session = Session.builder.config("connection", conn).create()
        # we just then will load the driver.py code and run it
        exec(open(application).read())
    # return an operator that will use our execute callback to run
    return PythonOperator(task_id=task_id, python_callable=execute)

with DAG("my_dag_snowflake", start_date=datetime(2021, 1 ,1), schedule_interval='@daily', catchup=False) as dag:
    snowpark_submit_task = submit(
		application ='/home/BlackDiamond/workspace/snowpark_sample1/driver.py' ,
        py_files='/home/BlackDiamond/workspace/snowpark_sample1/dist/snowpark_sample1-0.0.1-py3.8.egg',
		task_id='snowpark_submit_task'
	)
    # Some code omitted...
    snowpark_submit_task >> training_model_tasks >> choosing_best_model >> [accurate, inaccurate]
Now that will render a DAG like this:
You can check the execution log from the graph:
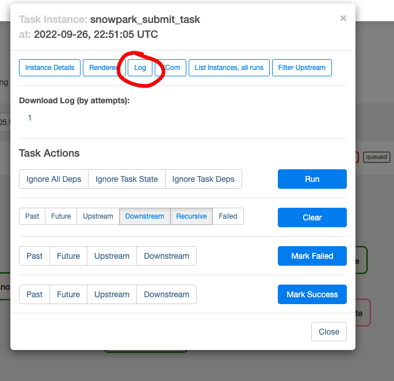
So as you can see it is very easy to switch spark jobs to snowpark jobs.
Final recommendations
All the code in this post was developed with BlackDiamond Studio, and the good thing is that this a Cloud IDE that you can just start and everything is already set up to get you started with SnowPark.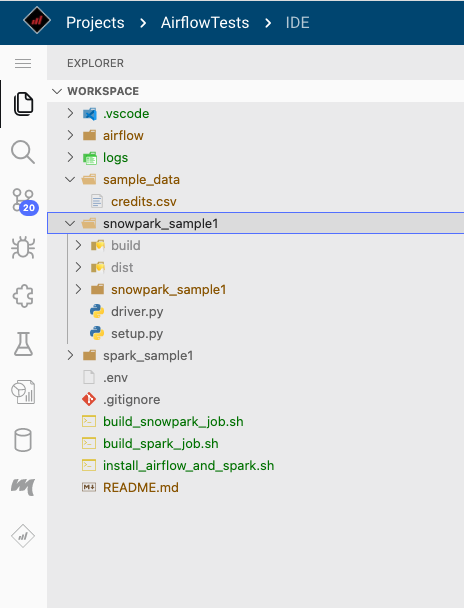
Debugging is easy as you can just put breakpoints as start it:
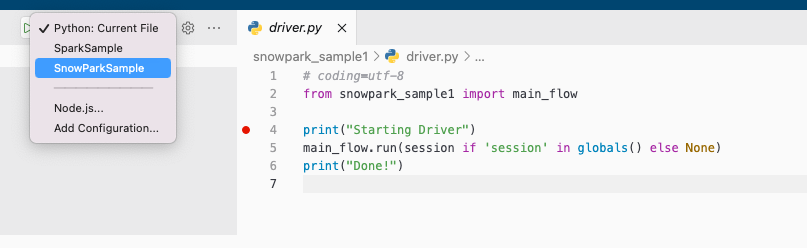
Much easier than in Spark.
Standard Python logging practices are supported and support for udfs and stored procedures logging is in private preview.
Other options for using Snowpark with Airflow
- Snowflake operator (available): you could convert existing airflow tasks to Snowpark python stored procedures, then use the Snowflake Operator to build DAGs that invoke these python store procedures. This approach would work provided the python code can run in stored procedures. If you are running on a legacy Airflow Version and using a python version lower than 3.8 this can be an option. Also in some scenarios it will make versioning easier as jobs will be deployed directly into snowflake.
- TaskFlow API (available): with TaskFlow API, and either use the @dag and @task decorators directly, and leverage the snowpark libraries directly. As shown here the snowflake provider can be used to configure a Snowflake connection and this connection can be used to setup a snowpark session. See the blog post code for details.
- Snowpark operator (in progress): this operator would essentially be a hybrid of the snowflake operator and the python operator. It would round out Snowpark support for the airflow ecosystem by allowing more integrated support with Snowpark.
I think this post got a little long but this in an interesting topics. Reach us to us if you have more Snowpark related questions.
The code for this article can be found here: https://github.com/GAP/SnowparkAndAirflow
