


by Brandon Carver, on Nov 16, 2020 3:09:43 AM
Sometimes, the simplest solutions can be the hardest to find. If you've ever found yourself scouring the internet for a way to do something that seems like it should be obvious (or trying to find that link in Stack Overflow that you've already visited, but are in need of visiting again... and again... and again...), then we have a lot in common. This can be especially frustrating when you're interacting with software; particularly, with software that you know and have been familiar for quite some time.
This blog is going to start taking on some of those small issues across a variety of programs and applications. So feel free to get excited. If you've got any suggestions, feel free to leave them in the comments below.
Let's start by solving one of those problems in this space. In case you missed it, we recently released our free code analysis tool, ByteInsight, which builds an inventory of all files any directory that has code files in it. The output from which are a couple of csv files with a lot of detailed information, which we wrote about in this very space. You can then upload the output back into ByteInsight and we'll perform some analysis for you or you can have a go at it yourself. When I was experimenting with the output, I found myself using Power BI, and decided to create a template file that I could use for any output of the tool. Sounds simple enough, right? Build the model and save it as a template. What if I want to prompt the user whenever they use the template for the filepath to the file? Should have been an easy addition.
And it is. It just wasn't obvious. So it falls into the category of "things I'll be googling", and makes it's way to this blog. If you're looking to create a template file in Power BI where you will be prompted to choose a file to run the template on, then you can do so by creating the input filepath as a parameter for the template.
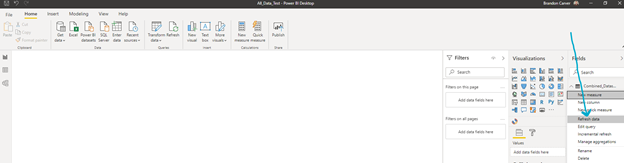
There's plenty of information out there on how to use parameters, so this will focus on building one particular parameter. Before we get too far down that road though, make sure that you're needs are satisfied by creating a template file. If you're meaning to open up a Power BI model to an ever changing dataset, then you may not need to use a template file. If you have a model that is built as a project file already connected to a specific data file (with a particular filepath), but the data in the file is being updated (either regularly or irregularly), then all you have to do is refresh the data in Power BI. Right click on your data in the Power BI client and hit refresh. Easy!
If you're looking to point a project file at a different file, you could load the new file into the same project that you already have the original file in, but using a template makes so much more sense.
If you've got already got a project file where you want to be able to upload a new dataset (with the same structure) already built, just follow the steps below to build the template. (And feel free to acknowledge the greatness of the consummate drawn blue arrows in the images below.)
- Select "Transform Data" from the ribbon on the main menu which will open the Power Query Editor in a new window.

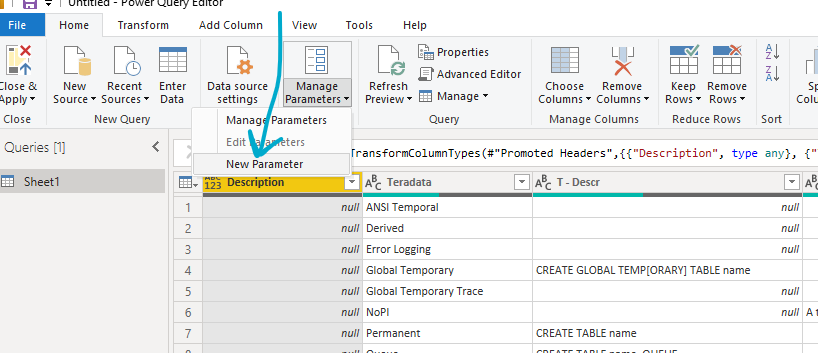
- If you click on the drop down for Manage Parameters in the ribbon of the Power Query Editor, a menu will come up with "New Parameter" as an option. Select it.
- In the New Parameter window (which may still say Manage Parameters at the top, but... let's just move on), there are four things that you should specify.
- First, the Name. This is the name of the parameter, not of the file you're referencing. Call it whatever you like. I chose "Input_Filepath" in the example below.
- Secondly, specific that this parameter is required by ensuring the checkbox next to Required is selected.
- Third, change the Type to "Text".
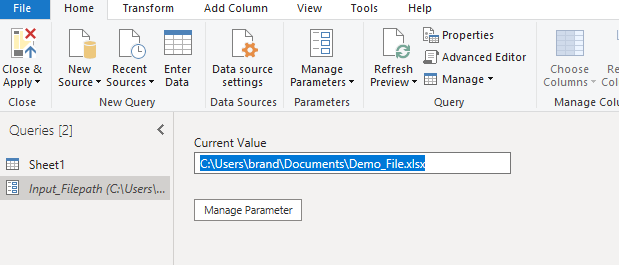
- Finally, the Current Value needs to be changed to the current filepath where the data you have loaded in the model can be found. Note that it is the full path, and not just the filename, as you can see in the example below.

- Once you select OK, you will see the parameter.
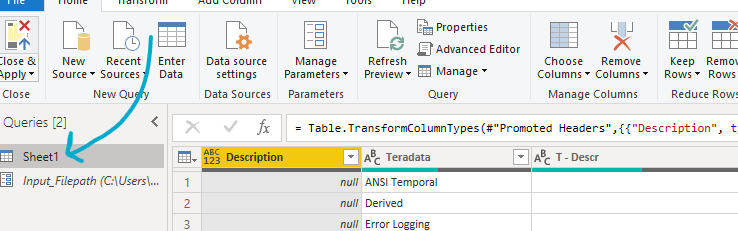
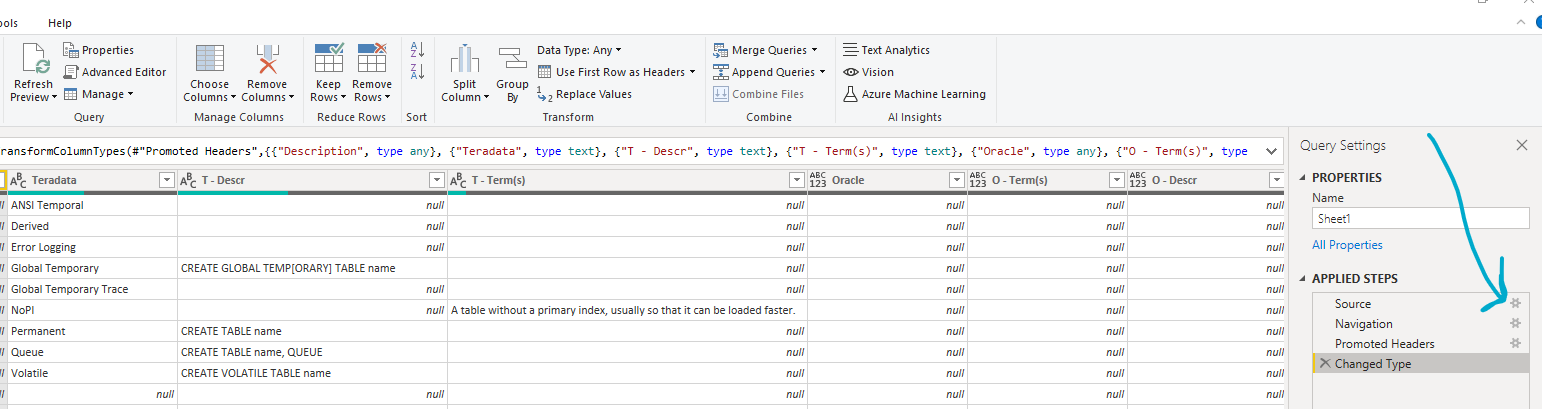
- Now you need to change the source of the data in the project to the parameter that you've just created. First select the data (not the parameter) from the Queries Navigator Name. You may have many data sources depending on your model, but chose the one that you are wanting to replace with the parameter.
- Edit the settings for the Source of the data. You can click on the gear next to Source in the Query Settings Navigation Panel to get to the settings menu.
- Change the File path from the actual file path to the parameter that you just created by selecting the icon to the left of the filepath, then selecting parameter, and finally select the parameter that you just created.
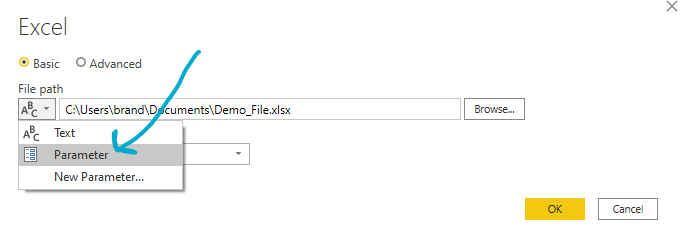
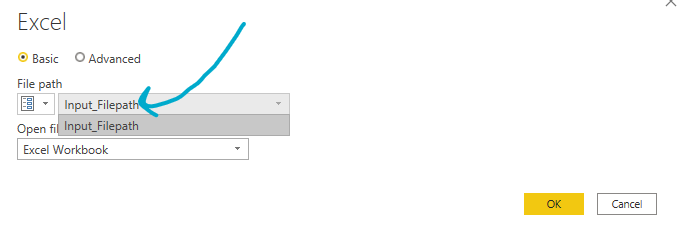
Note that these instructions are the same regardless of whether you're getting your data from an excel file, a csv file, or any other kind of text file. However, the menu's may look slightly different. - Close the Power Query Editor and make sure that you respond "Yes" to apply your changes now.

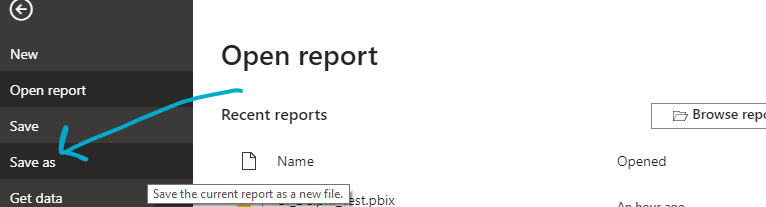
- All of that was to get Power BI to reference a parameter for the location of the file. Now we need to actually save this project file as a template file. (And get excited, there should be fewer steps here.) Select File in the top left corner of the main menu, and choose Save As.
- Under "Save as type:" in the bottom of the save menu, choose Power Bi template files (*pbit), and save the template wherever you'd like.

- Finally, you will be prompted to export the template with a "Template description". This description will show up when the user first opens the template file. In this description, it would be wise to include instructions on what you'd like the user to do.
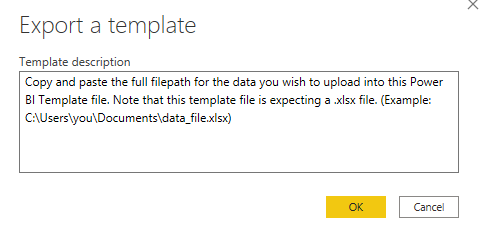
And it will show up when you open the template file.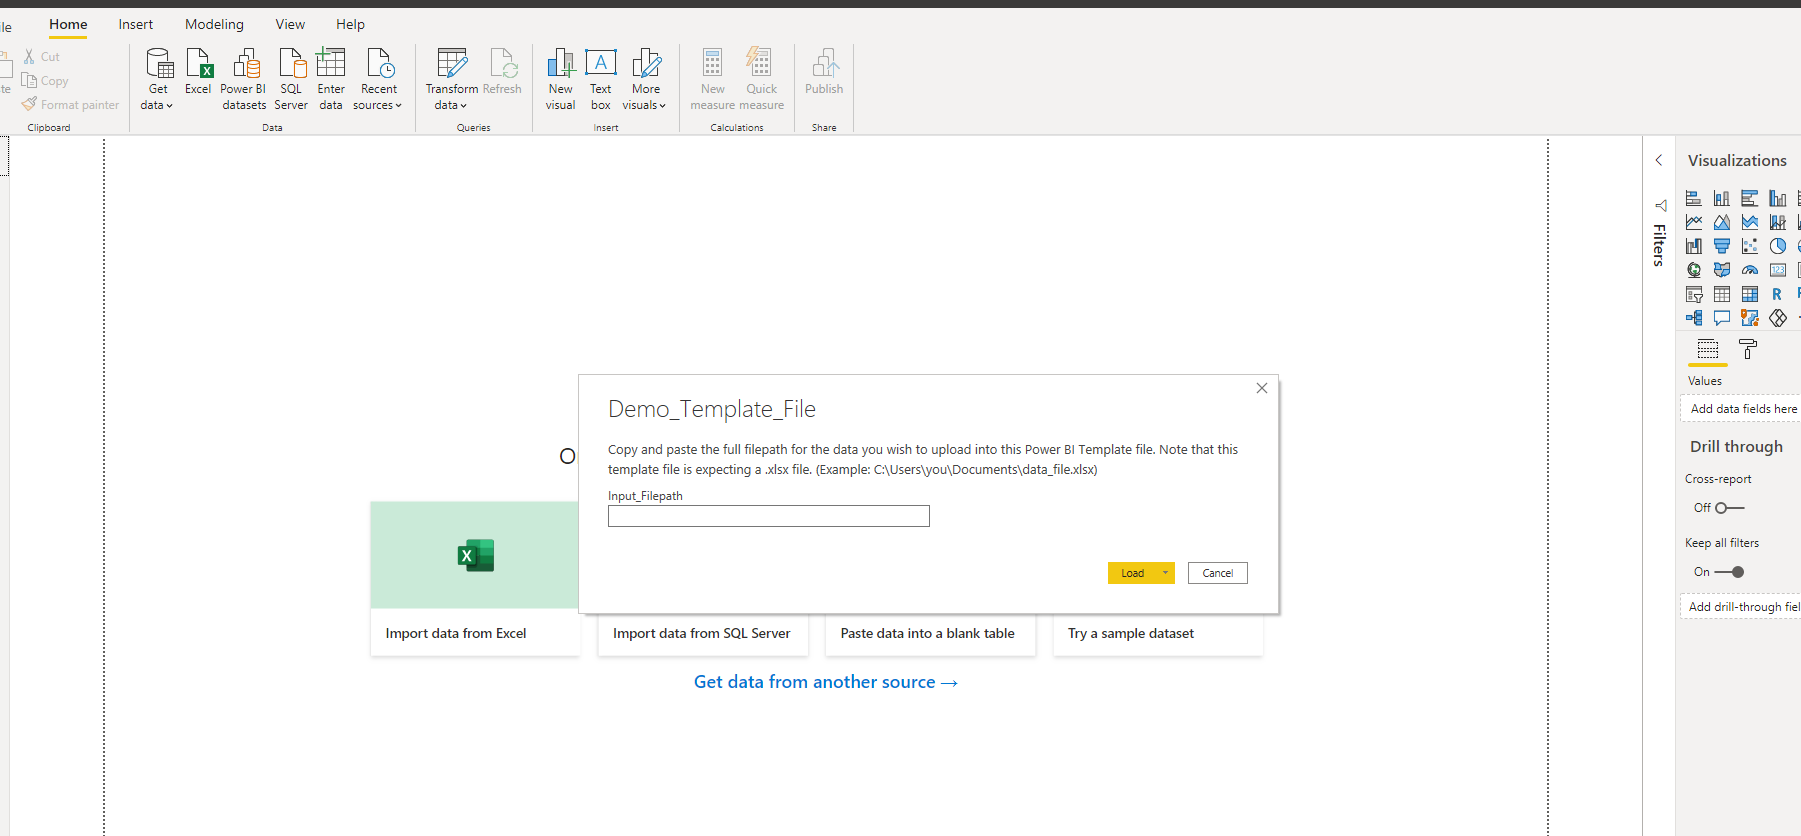
As a side note, once you've gone through this process, your original project file is not saved. All of the visuals you have put together are saved, but the template file does not contain any data. If you want to save the data that you currently have in the file, you need to save it as a project file.
As was previously noted, any new data files that you upload into the template will need to have the same structure (the same columns) as the original file had.
And that's it! Now you have a template file that will prompt the user for a new filepath if you want to point your Power BI model at a new file... and it only took 11 steps (with 10 beautifully drawn blue arrows in the screenshots above).
And don't forget to get your free copy of ByteInsight!
