

by Brandon Carver, on Nov 7, 2022 10:04:36 AM
SnowConvert for PySpark is now available in Assessment Mode. Now, you can take any Spark code you may have written in Python and get an assessment of your PySpark code. Considering Snowpark? You can better understand how much of your code can be automatically converted to Snowflake. Not considering Snowpark? That's ok. The assessment is built on your Spark code, and you'll get a complete inventory of the references to the Spark API in your Snowpark code.
When you run the assessment, you will get the following three reports:
- File Inventory - This will generate an inventory for all of the files present in the input directory of the tool. This could be any file, not just the ones listed above. You will get a breakdown by filetype that includes the source technology, code lines, comment lines, and size of the source files.
- Keyword Counts - A count of all keywords that is present broken out by technology. For example, if you have a CREATE statement in a SQL file, this file will keep track of all of them. You will get a count of how many of each keyword you have by filetype.
- Spark Reference Inventory - Finally, you will get an inventory of every reference to the Spark API present in your Python code. These references will form the basis for assessing the level of conversion that can be applied to a given codebase.
Beyond this, you can engage with Snowflake's Snowpark team or the Mobilize.Net SnowConvert for PySpark team to get a readiness score for how "close" your code is to Snowpark. So how do you run the assessment? (Note that this assessment may sometimes be referred to as "qualification mode" or "analysis mode", but the result is still the same.)
Running the Assessment in BlackDiamond Studio
It only takes minutes to run the assessment by taking advantage of BlackDiamond Studio. You can sign up for an account in seconds. This is free and easy. You can fill out the form on the PySpark to Snowpark page.
Follow the instructions to get logged in. Once you are logged in to BlackDiamond Studio, start a new project on the main project page by clicking the big "+" sign to create a new project:

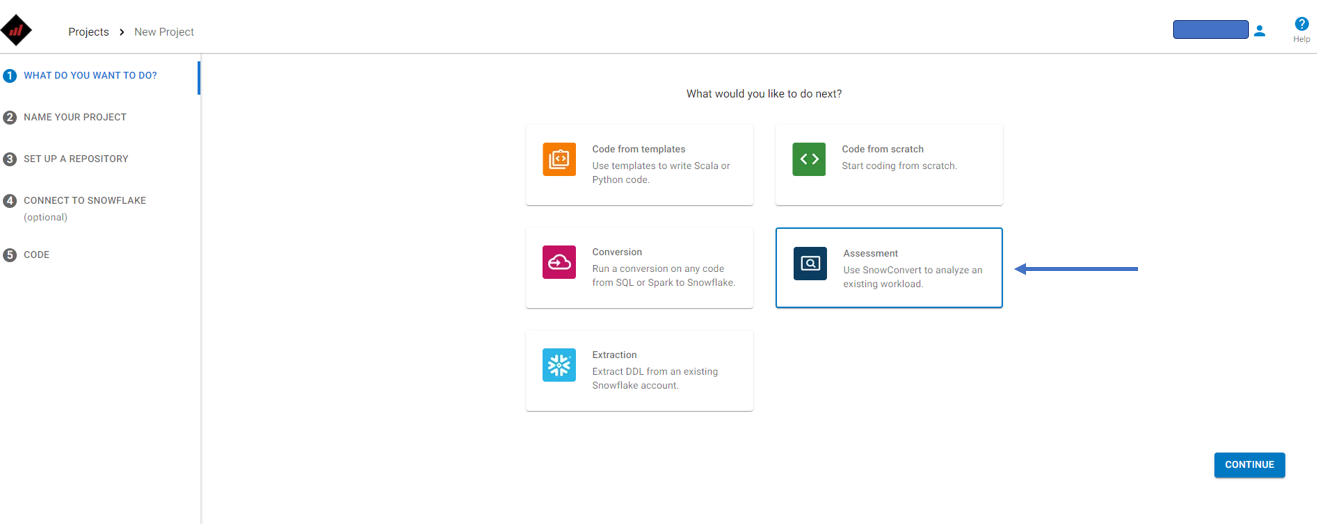
On the project creation screen, you will be asked what kind of project you'd like to start? Choose Assessment to get started with a PySpark assessment:
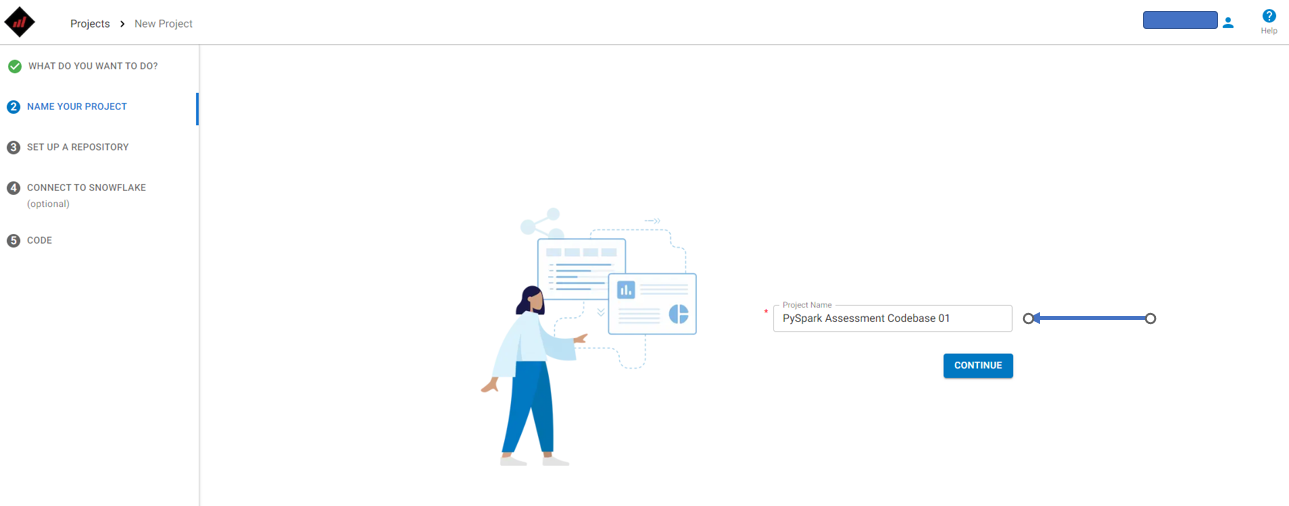
Name your project. This project name will be associated with this project in BlackDiamond Studio. It will not be applied to your Git Repository. This name can be changed once the project has been created:
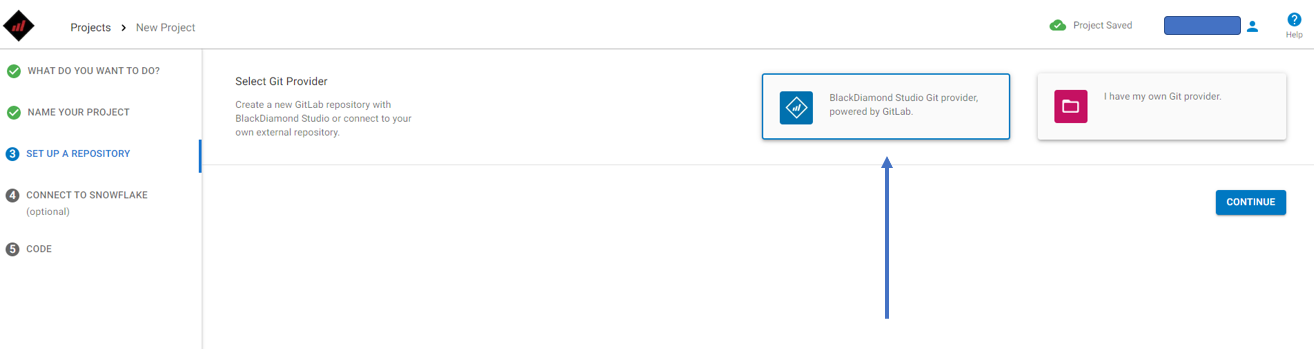
BlackDiamond Studio connects your Snowflake account with a Git Repository. While the connection to your Snowflake account is optional, you will need to specify a repository that you'd like to use for version control of your account. You can either connect an existing GitHub repository that you'd like to reference with this project or have BlackDiamond Studio create you a GitLab repository. For the purpose of this walkthrough, we can choose to have BlackDiamond Studio create a Gitlab repo:
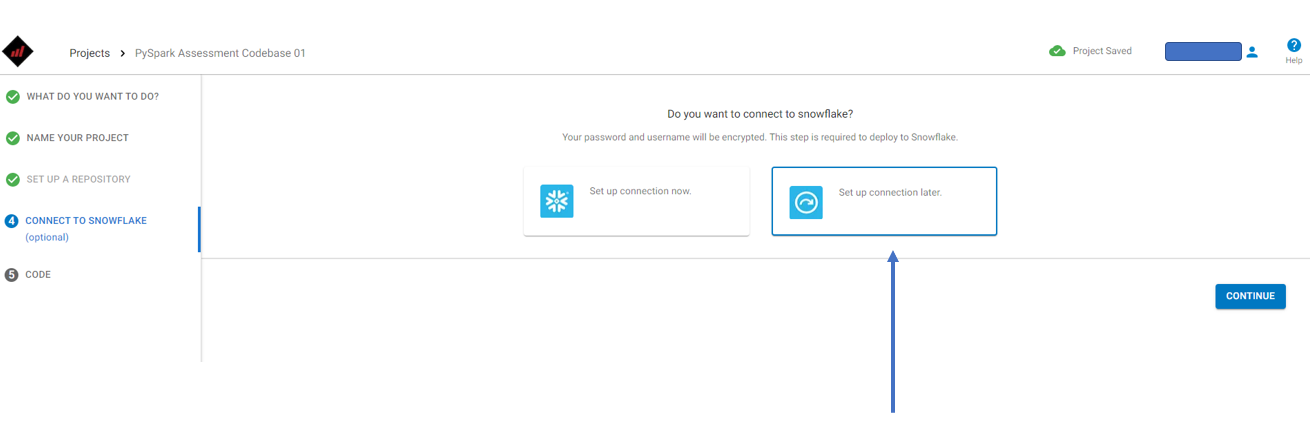
Next you can choose to connect your Snowflake account. If you want to upload some Python code, test and run it, you will need to connect to your Snowflake account. If you're just looking to get the inventory of your Spark Python, the connection is not necessary. In the interest of speed, we can skip this part now:
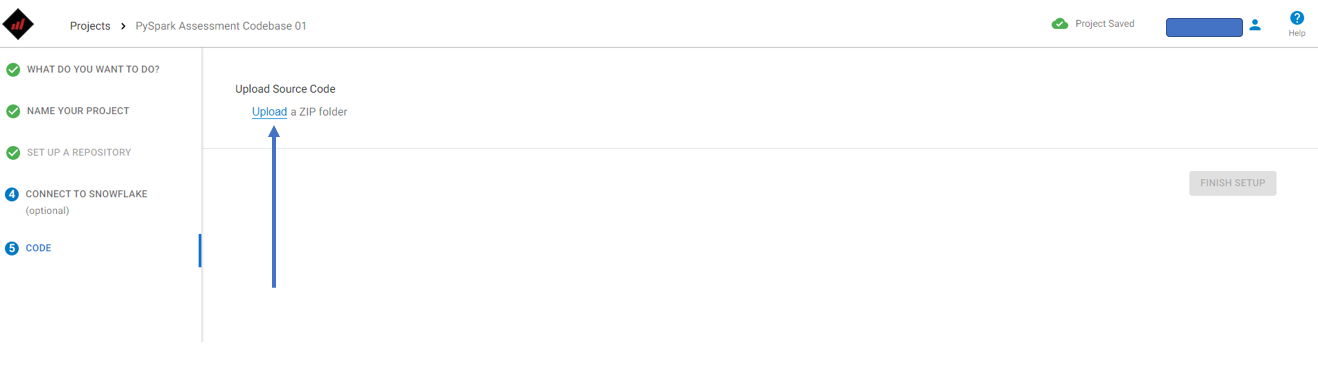
Finally, it's time for the assessment. BlackDiamond Studio will ask you to upload the code you'd like to assess into the Git repository that you just connected. This code will need to be in a .zip file format. Take any PySpark code (this could be either .py code files or .ipynb notebook files) and place the code into a folder. Zip that folder, and upload this .zip file into BlackDiamond Studio:
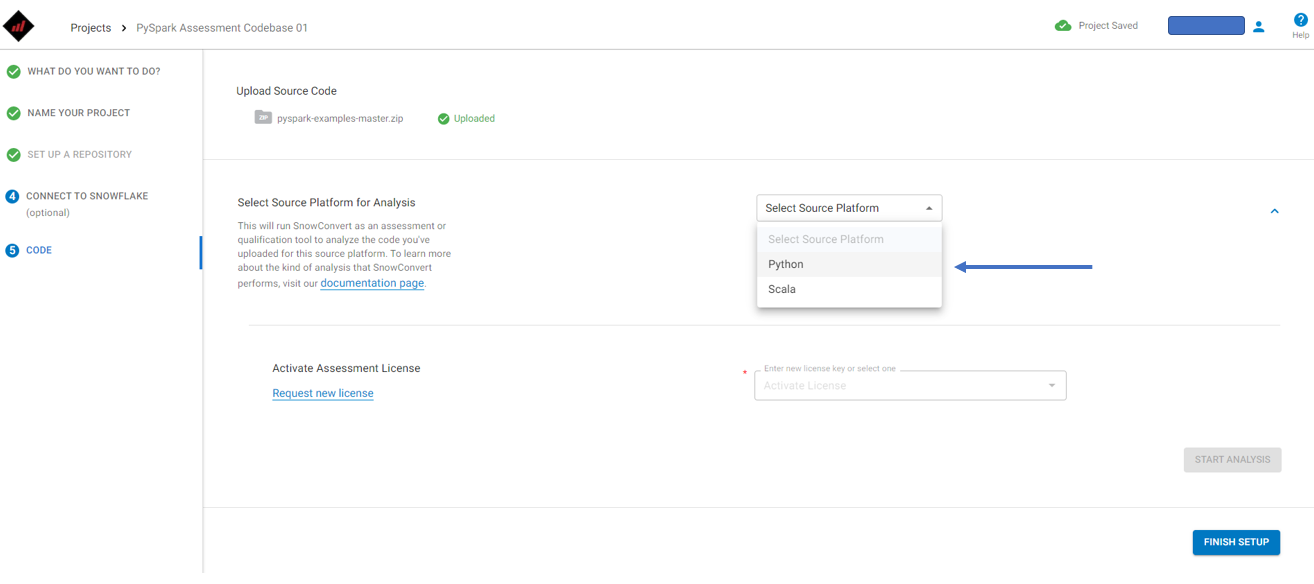
The zip file will be processed by BlackDiamond Studio, and the code files you've uploaded will be dropped into the Git repository, preserving the original code and directory structure. Once uploaded, BlackDiamond Studio will ask you to choose the source technology of the code files. Since this is PySpark, choose "Python" as the source language:
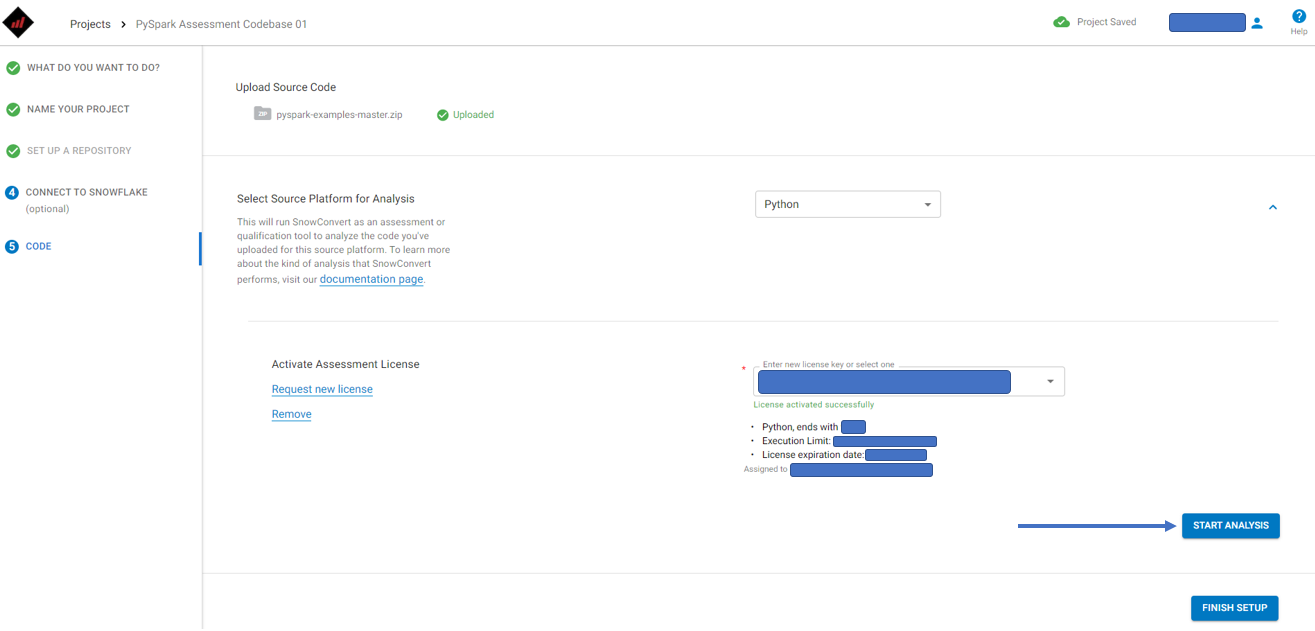
When you choose the source language, a license will be generated automatically. (If you already have a license through another source, you can paste that license string over the one generated by BlackDiamond Studio.) Once the license is loaded, you can your the assessment by clicking on "START ANALYSIS":
BlackDiamond Studio will call SnowConvert for PySpark on the code you uploaded. When finished, your project setup will be complete. You can select "FINISH SETUP":
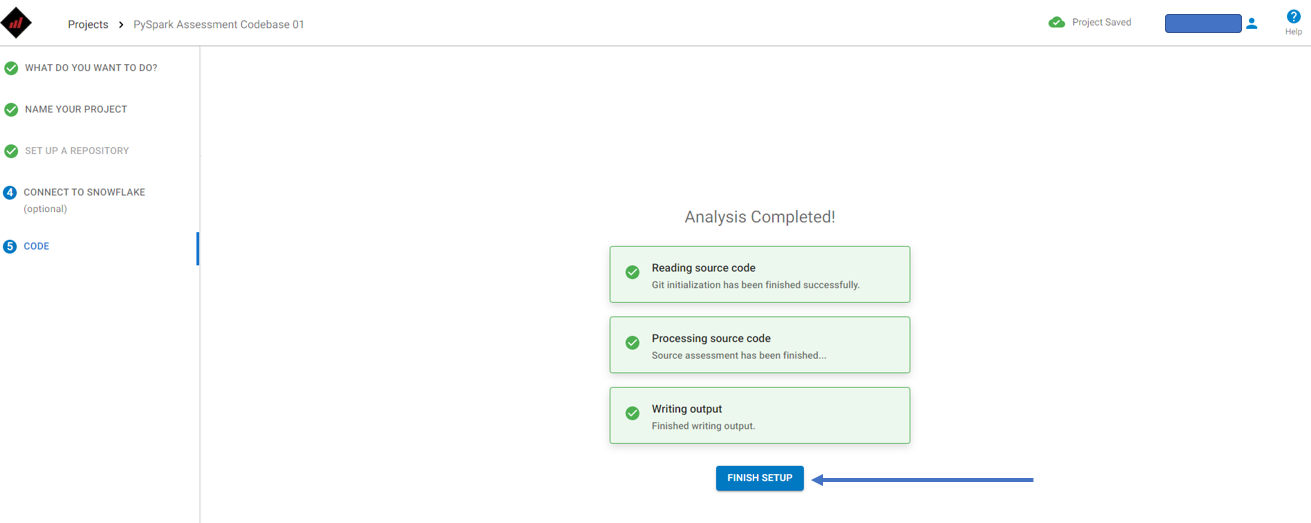
When the setup is complete, your analysis will be complete as well. A screen will indicate that you are finished and give you some next steps.
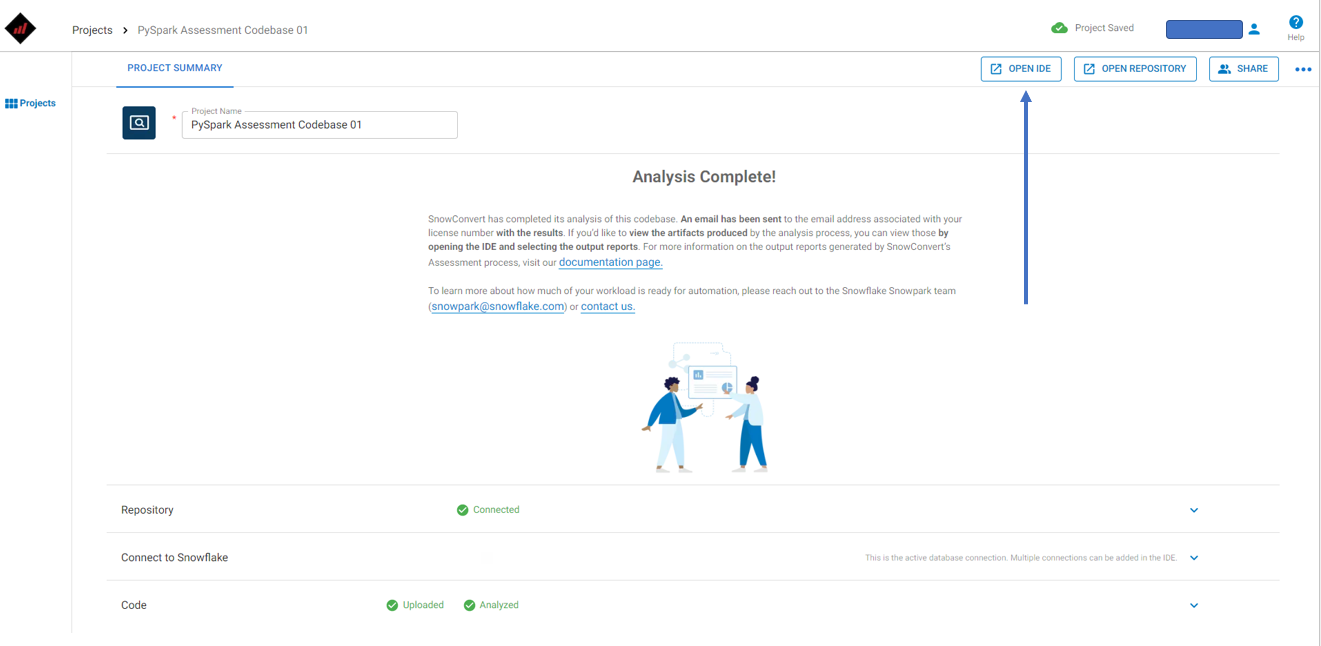
So... where's your assessment? The output reports of SnowConvert for PySpark are now available in the Git Repository that you connected earlier. You can view them in either the BlackDiamond Studio IDE (hosted version of VS Code optimized for Snowflake) or the GitLab Repository that was created when we started the project. Entering the IDE might be more interesting because you can edit, debug, and (with a connected Snowflake account) deploy the code to Snowflake. To enter the IDE, select "OPEN IDE":
When you open the IDE, a cloud-based version of VS Code will spin up connected to your Git Repository. In the file explorer, you will see a "Reports" folder and a "Sources" folder.
- In the Reports folder, you will find the three reports mentioned above that you receive as the output of the conversion tool. Each of these is a spreadsheet (the inventory of Spark references is shown in the image below) that can be opened directly in the IDE.
- In the Sources folder, you will find all of the files that you originally uploaded into the repository. This will include all of the Python (.py and .ipynb) files you may have, but also any additional files that were in the .zip file when it was uploaded. Note that the file inventory report will show you a list of all files you uploaded, regardless of whether they were Python files or not.
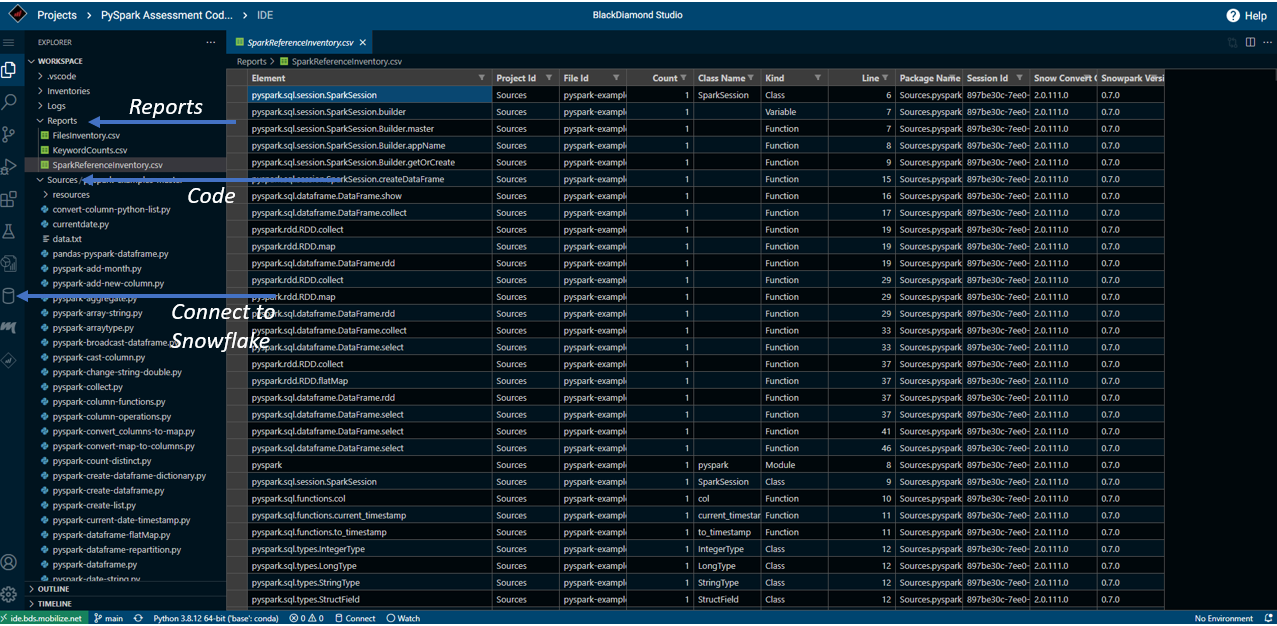
Once you are in the IDE, you can run your Python code. There is a fully integrated development environment for Python that is available. And remember when we skipped the "Connect to Snowflake" step earlier? If you click on the small database icon on the left side of the IDE, you will be able to setup your connection directly from the IDE. This will be very beneficial when it comes time to convert this code to Snowpark.
Next Steps
Speaking of conversion, how can I get the exact readiness score? And how can I convert that code to Snowpark automatically? Great questions. For now, you can reach out to Mobilize.Net for more information on how to get your assessment results. When you run the assessment an email will be sent to you with more information on how to reach out. On the "Analysis Complete" screen before you enter the IDE, there are two email addresses available for you to reach out. Just send us an email as ask if you can access your readiness score and how to access the conversion tool.
Spark to Snowpark is possible. BlackDiamond Studio can get you started. Let us know how we can help pave this road for you or your organization.
