


by Mauricio Rojas, on Oct 8, 2019 12:57:15 PM
In this post, we'll look at the steps necessary to migrate a Visual Basic 6 app to .NET Core 3.0.
We will use our reference app Salmon King Sea Food available on Github.
This guide explains the steps necessary to port apps in general and will walk you through the changes you need to apply to the SKS sample.
Migrating to .NET Core is great because once converted to a .NET Core application, apps can now be extended with everything new that .NET will include in the future.
Step 0 – Prerequisites
To port your desktop apps to Core, you’ll need .NET Core 3 and Visual Studio 2019.
You also need a trial version of the VBUC
Step 1 – Migrate from VB6 to .NET Framework
Migrate the SKS to Windows Forms using the VBUC
Step 2 – Migrate the project to a SDK-style .csproj
It is usually easier to start with the VS templates. So let's try that.
- Open Visual Studio 2019 and Select Create New Project
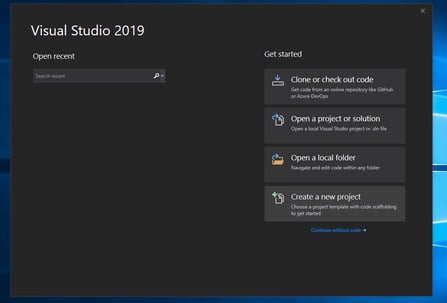
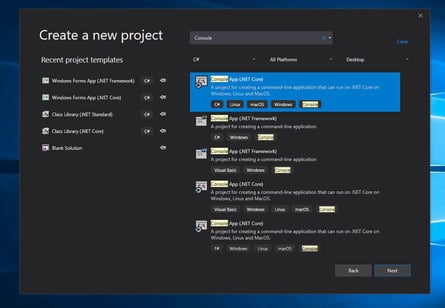
- Create a new NetCore Console App
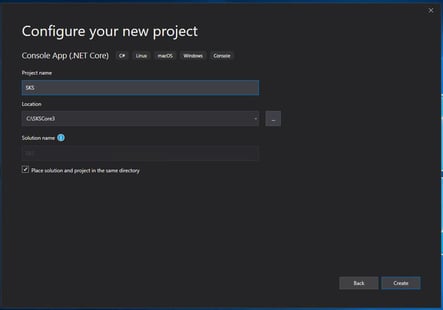
- Set the project name and location. For example SKS for our SKS app
In Solution Explorer remove all project file items and right-click on your project (not on the solution!) and select the Edit Project File option.
Now we will edit the project file, to adjust it as a proper WinForms NetCore3 app. So remove the contents of project file and replace it with:
<Project Sdk="Microsoft.NET.Sdk">

    <PropertyGroup>
      <OutputType>WinExe</OutputType>
      <TargetFramework>netcoreapp3.0</TargetFramework>
      <UseWindowsForms>true</UseWindowsForms>
      <GenerateAssemblyInfo>false</GenerateAssemblyInfo>
      <StartupObject>SKS.modMain</StartupObject>
    </PropertyGroup>

</Project>
The UseWindowsForms and OutputType property set the project as a .NET Core 3 windows forms app. Notice that TargetFramework which is now netcoreapp3.0.
The <GenerateAssemblyInfo>false</GenerateAssemblyInfo> is set because we will use the AssemblyInfo from the old project.
Step 4 – Change nugets
Your old application relied on nugets targeting .NET Framework. The VBUC team has already new nugets that will help you transition to .NET Core.
Add these references:
  <ItemGroup>
    <PackageReference Include="Microsoft.VisualBasic" Version="10.4.0-preview.18571.3" />
    <PackageReference Include="Mobilize.VBUC.Helpers.All" Version="8.1.2-rc0876" />
    <PackageReference Include="System.Data.Odbc" Version="4.5.0" />
    <PackageReference Include="System.Data.OleDb" Version="4.6.0-rc1.19456.4" />
    <PackageReference Include="System.Data.SqlClient" Version="4.6.1" />
    <PackageReference Include="UpgradeHelpers.DataGridViewCommon.NetCore3" Version="8.1.2-rc0876" />
    <PackageReference Include="UpgradeHelpers.DataGridViewFlex.NetCore3" Version="8.1.2-rc0876" />
    <PackageReference Include="UpgradeHelpers.DB.ADO.Controls.NetCore3" Version="8.1.2-rc0876" />
    <PackageReference Include="UpgradeHelpers.DB.DAO.Controls.NetCore3" Version="8.1.2-rc0876" />
    <PackageReference Include="UpgradeHelpers.DB.Essentials.Controls.NetCore3" Version="8.1.2-rc0876" />
    <PackageReference Include="UpgradeHelpers.Gui.ContainerHelper.NetCore3" Version="8.1.2-rc0876" />
    <PackageReference Include="UpgradeHelpers.Gui.Graphics.NetCore3" Version="8.1.2-rc0876" />
    <PackageReference Include="UpgradeHelpers.Gui.NetCore3" Version="8.1.2-rc0876" />
    <PackageReference Include="UpgradeHelpers.SupportHelper.NetCore3" Version="8.1.2-rc0876" />
  </ItemGroup>
For the SKS those are all the Nugets you need, but for other applications you might need some additional references.
The SKS uses OLEDB so make sure that you have the OLE DB Jet Engine Installed. Also this engine is for x86 or x64. So for example if you want to keep using x86 then add this to your project.
  <PropertyGroup Condition="'$(Configuration)|$(Platform)'=='Debug|AnyCPU'">
    <Prefer32Bit>true</Prefer32Bit>
    <PlatformTarget>x86</PlatformTarget>
  </PropertyGroup>
  <ItemGroup>
    <None Update="Orders.mdb">
      <CopyToOutputDirectory>Always</CopyToOutputDirectory>
    </None>
  </ItemGroup>
Step 5 – Copy your code
Now go back to the Solution Explorer and right-click on your project (not on the solution!) and select the Open Folder in File Explorer option.
Copy all the source files from the output of the VBUC to this folder.
Step 6 – Compile and enjoy!
The VBUC does not currently generate projects targeting .NET Core 3 but as you can see is not that difficult to adjust the output to start enjoying .NET Core 3.
